
If you are already baking your own bread, like our Simple Loaf recipe, you might feel ready or curious to take your baking to the next level. Sourdough, with its peculiar bitter taste and its all-natural, simple process, is the perfect step to that next level. When I decided to begin my sourdough voyage, I made mine from scratch in ten days, using the process suggested by Hugh Fearnley-Whittingstall, and which I will share with you in this recipe. When I moved to Singapore, unsure I wanted to venture again into the ten days’ effort (and a lot of precious flour wasted) I started keeping an eye on my fellow food bloggers to see who amongst them were baking bread. Someone must be making sourdough in sunny Singapore, I thought. In fact, I came across the lovely FatClay, who was posting a lot of images of his sourdough bread on Instagram, and I decided to ask him for a small part of his starter, which he happily agreed to share with me. A couple of feedings after, I was ready to bake! The process is lengthy, but the results meet the effort entirely, to the point that I really try and make it a weekly appointment with my oven.
Ingredients
For the starter:
100g strong bread flour (it’s recommended that you use 50% wholegrain)
1kg strong bread flour (or a mix of flours – but I would say it’s safer to start with white flour if you are new to fermenting)
For the sponge:
150ml active starter
250gr strong bread flour
For the loaf:
300gr Strong bread flour
2 tbsp extra virgin olive oil
1 tbsp salt
Step 1 – If you are making your own starter, you must commit to it for at least ten days. Start placing 100g of flour in a bowl and mix it with warm water until you reach a thick paint texture. Cover the bowl with cling film and let it rest, ideally in a warm place to ease the fermentation process. Checking every few hours to see that it is fermenting, you will notice bubbles and a not-so-pleasant acidic smell.
Step 2 – Once the starter shows signs of activity, you will start feeding it. Add 100g fresh flour, mix it in and add enough water to retain the thick paint consistency. Leave it at room temperature and after 24 hours, scoop out and discard 100ml of starter, add 100g fresh flour and enough water to maintain the same texture as before. Repeat the discarding and feeding routine every day and keep your starter at room temperature. It should take 7 to 10 days to be active, so don’t rush it and wait till at least the tenth day to attempt your first loaf.
To maintain the starter, feed it according to your baking needs – if you will bake every two/three days, keep feeding the starter every day and retain a sloppy texture. If you bake once a week, you can add less water and keep the starter more solid, which will only need feeding every four days. Alternatively, keep your starter in the fridge so you can feed it only once a week. Just remember that before using it you need to take it out of the fridge and give it a feed to make it active again.
Step 3 – If you are happy with your starter, you can proceed with the loaf preparation. This needs an extra step, which is called the “sponge”. I usually make the sponge on a Saturday night so it is ready for my Sunday baking. In a large bowl, mix 150ml of starter with 250g of flour and 275ml of warm water. Mix it until there are no flour knots left and cover it in cling film and let it rest all night. The next day you should have a thick, bubbly and sticky sponge.
Step 4 – Place the flour for the loaf in a large bowl, add in the salt and the oil, mixing thoroughly. Please note, if your sponge is not very bubbly and active, it might be a good idea to add some powder yeast. You can add it as a precaution, but rest assured that if your sponge is active and has swollen and made a lot of bubbles, you really won’t need it. Add the sponge in and start working the dough with your hands.
Step 5 – Knead the dough, manipulating it on a lightly floured surface if needed. If you notice that the dough is very firm, add some water. Viceversa if the dough is too wet, add flour, but keep it fairly wet, as this helps with the rising process.
Step 6 – Keep working the dough until it’s smooth, then coat it with a bit of olive oil, and let it rise for up to five hours. Sourdough takes a lot longer to rise, so I usually work the dough in the morning and get on with my day so I can get back to it in the afternoon.
Step 7 – Once the bread has risen, knead it again. Punch it so it looses all the air, and if you love your loaf seeded, this is the moment to add your favourite seeds in, then keep kneading until you have a smooth homogenous dough again.
Step 8 – If you have a proving basket, dust it with flour and place your dough there. Otherwise, create your own proving basket by lining a large bowl with a clean cloth, dusted in flour. Place your bread in the bowl, coat the surface with oil again and cover it in cling film. Leave it to prove again for one hour and a half to three hours, in a warm place. You can turn the oven on without turning on the temperature and use it as your proving space.
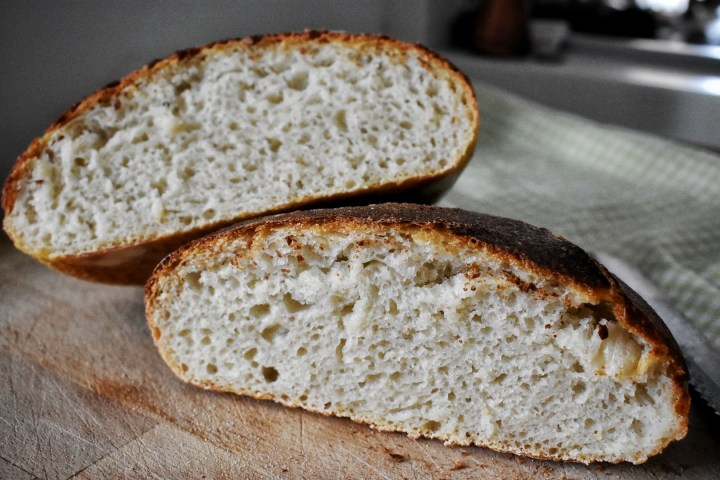
Step 9 – When the three hours have passed, place your dough on an oven tray (can be a hot tray) dusted in flour. Dust the top of your loaf in flour too, and, with a sharp knife cut it where you want it to open. Then place it in a hot oven at 250⁰ for 15 minutes. To help with the crust, place a shallow oven tray with water in the oven too, to create a humid environment. When the 15 minutes have passed, remove the tray with water and turn the temperature down to 200⁰. Let the bread bake for another 25-30 minutes, then let it cool down for 20 minutes at least before slicing it…et voila, your sourdough loaf is ready!
![]()
